
Table Of Contents
Here i would be describing how to install Jupyter Notebook in a personal laptop and getting up and running quickly. If you aren’t familiar with virtual env or venv, you can refer to this post. Basically, it provides a separate development environment for a particular project, so that conflicting dependencies issues can be avoided among projects as they all reside in same machine. Think of the virtual environment as a containerised development environment which is isolated from other development environment on same machine.
I faced some challanges when trying to setup the Jupyter Notebook in virtual environment on my system. However, i was able to install it correctly in the end. I am sharing my experience so that many of you can refer to it and avoid trouble i went through.
Before starting i would like to show my system setup as a reference to you all. I am using linux operating system - Ubuntu 20.04 as my development environment. My preferred virtualenv library is virtualenv + virtualenvwrapper and not venv. There are certain advantages to using virtualenv vs venv that i will discuss, but that’s for other time.
My first attempt installing Jupyter Notebook was:
- Creating a
virtualenv - Installing
Jupyter,labslibraries, and - Execute
Jupyter Notebookto start having a crack on it.
Create a virtualenv
Open terminal and run
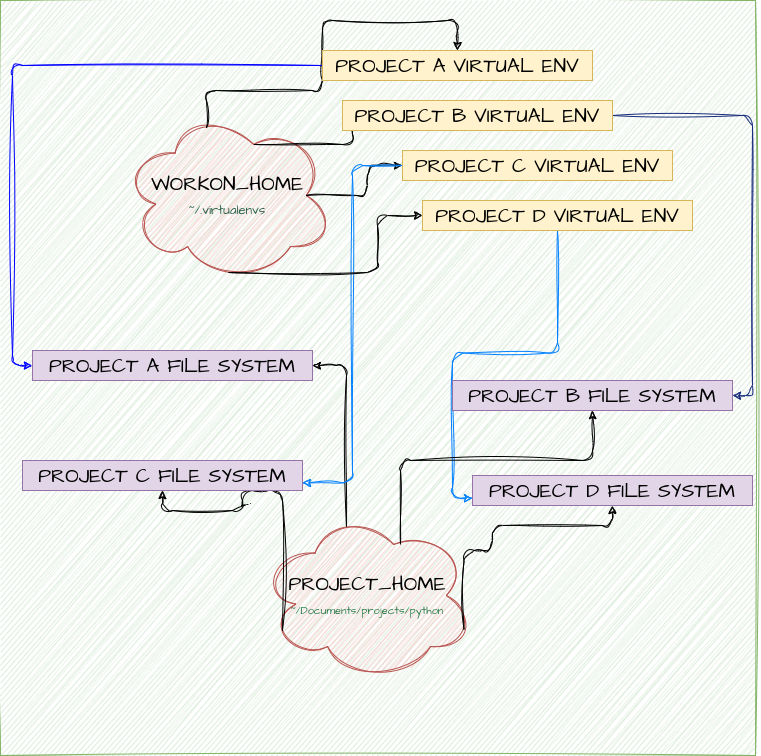
mkproject notebook
This command created a project folder in my PROJECT_HOME and created a virtual environment in WORKON_HOME . It automatically linked and activated the virtualenv and also landed me to development directory notebook
If you are interested to know my python development environment setup, let me know in comments.
Please note at this time my default installation on my system was python 3.8
Installing Jupyter libraries
pip install jupyter labs
This seemed to run okay and i did not get any error
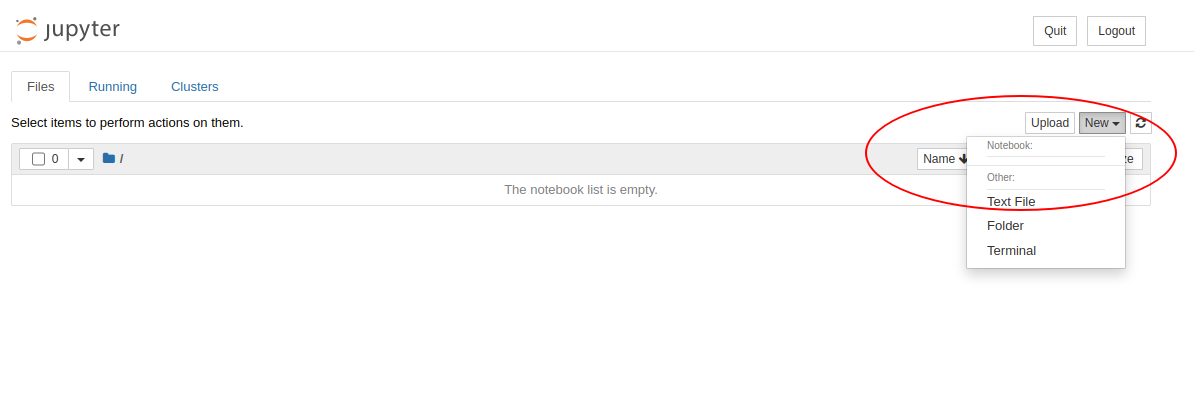
Starting Jupyter notebook
jupyter notebook
It launched the browser with jupyter notebook and it looked all good. but i was not getting Python 3 option under New on the right. Upon checking console i could see following errors in console:
Installing ipython kernel
pip install ipykernel
ipykernel installed without any error
ipython3 kernel install --user --name=notebook
returned errors:
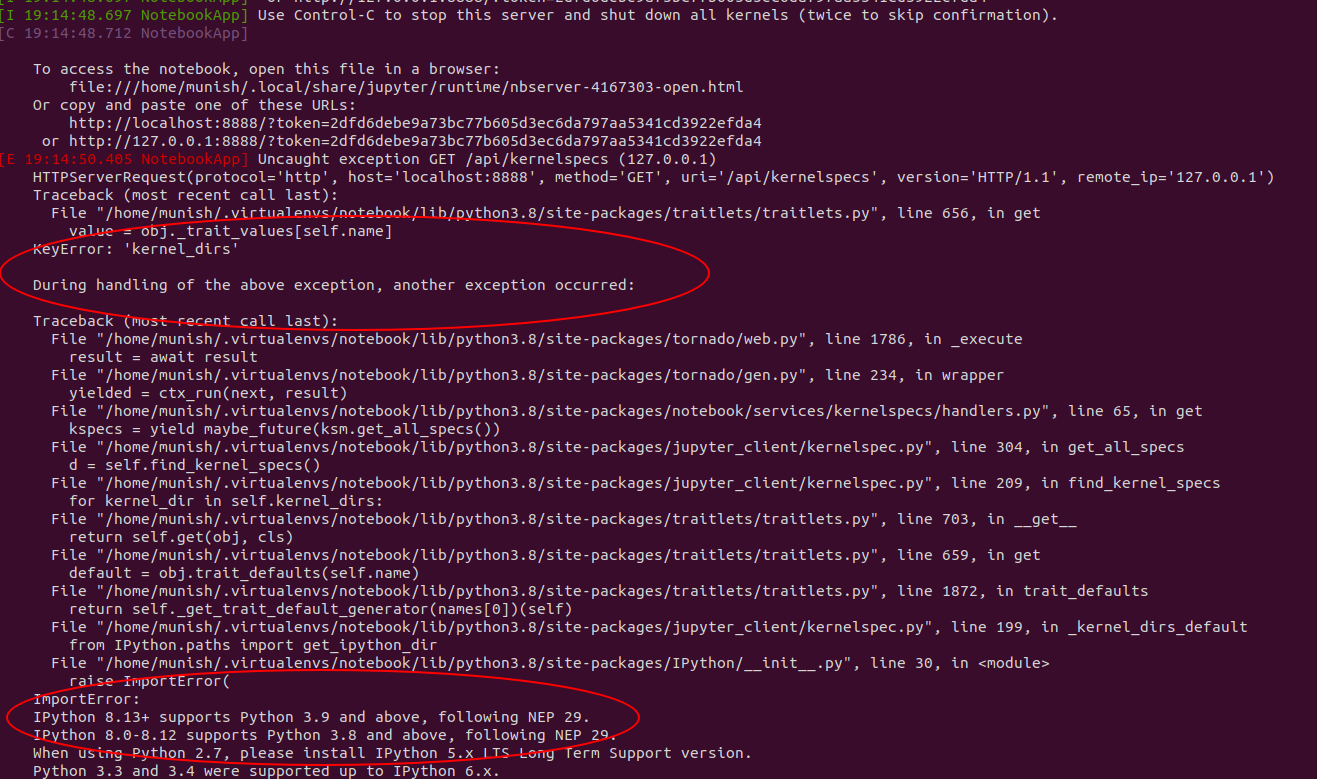
As you can see from last highlight it looks like my library of ipython may not be compatible with python3.8. Upon checking using pip list i saw ipykernel 6.22.0 and ipython 8.13.0 was installed.
I could have tried with lower version of ipykernl library, However, I decided to create a new virtual env with python 3.10 and then use appropriate ipython for same.
Deactivate current Notebook and recreate with python3.10
Following was executed in sequence
deactivate - deactivated current notebook virtual env
cd $PROJECT_HOME
mkvirtualenv -p python3.10 notebook - Create new env for jupyter notebook but with python3.10 this time
Installing ipython kernel
pip install ipykernel
python -m ipykernel install --user --name notebook
After installing both upon checking, ipykernel 6.22.0 and ipython 8.13.0 and python version was 3.10
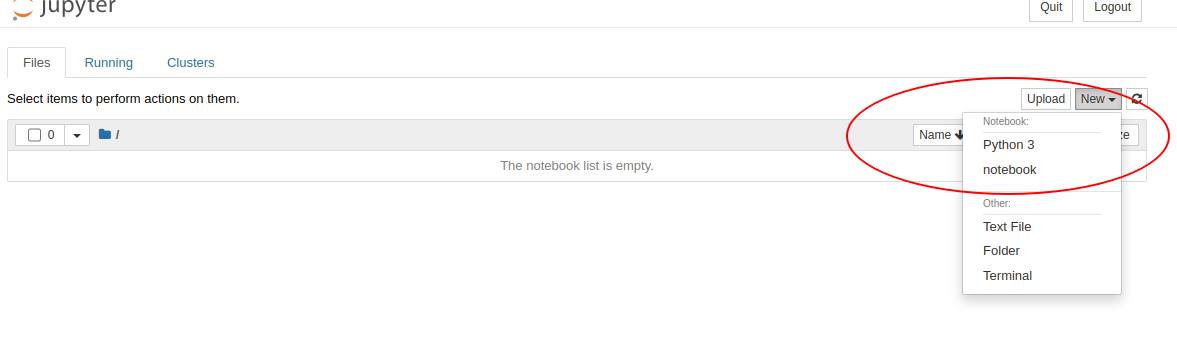
Uff.. after all this, the final step, which i expected to run. In terminal executed
jupyter notebook
And this time it launched jupyter notebook and everything worked fine. As you can see, i can create new notebook and can play with it as usual.
It was an interesting little project and i hope someone would benefit from it. Let me know your thoughts, if it could have been done any better.
comments powered by Disqus